iomando Dashboard 1.0
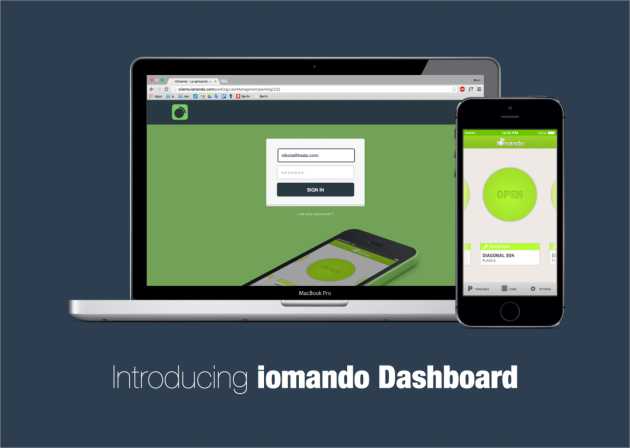
Our control panel is transitioning from beta to the newly named iomando Dashboard, and is now ready for release.
When we introduced iomando v2.0 in April 2013, alongside a hardware update, we also launched a beta version of our management console. Initially, it was intended as a supplementary tool to the existing management features within the mobile app, which we have been enhancing since its launch. Over time, however, it has evolved into a standalone product.
We previously announced ambitious plans for the control panel nearly a year ago. However, the introduction of new product lines slightly delayed its deployment. Despite this, we are thrilled to announce that our control panel has now shed its beta status, rebuild as the iomando Dashboard, and is ready for release.
Web Based
The most significant update for the iomando Dashboard is its transition to a web-based platform, moving away from being a native mobile app. I’ve elaborated on this decision in an additional post, but the primary reasons for this shift are:
- Our customers expressed a need for more professional tools, and we wanted to leverage a larger screen to maximize the potential of the iomando Dashboard.
- The tasks related to access and management began to diverge significantly. To optimize each experience independently, we separated the management capabilities from the mobile app.
- Our transition from a vertically integrated company to a horizontal service provider necessitated additional tools for integration with third-party services and for offering more customization options than a one-size-fits-all solution for end-users.
As a side note, starting December 1st, we will discontinue support for the mobile management tool, integrating all its features into the new iomando Dashboard.
Inside the iomando Dashboard
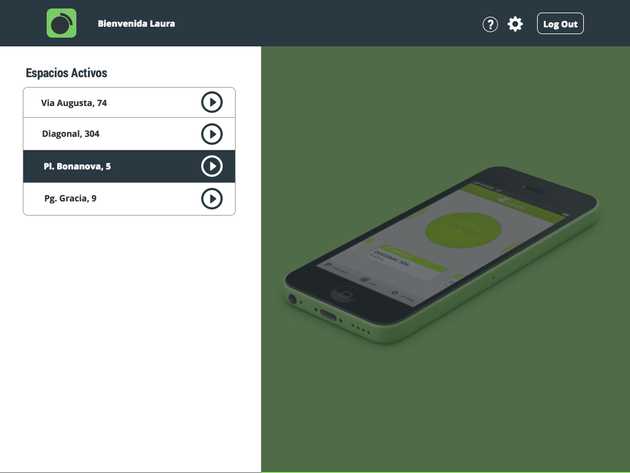
Upon logging in, the first thing you’ll notice in the iomando Dashboard is a comprehensive list of all your spaces. Selecting a space directs you to its Home section.
We’ve improved the navigation and enlarged the controls for better compatibility with touch interfaces and tablets like the iPad. The interface is intuitive, divided into four distinct sections:
- Home
- Access Control
- User Management
- Settings
Home
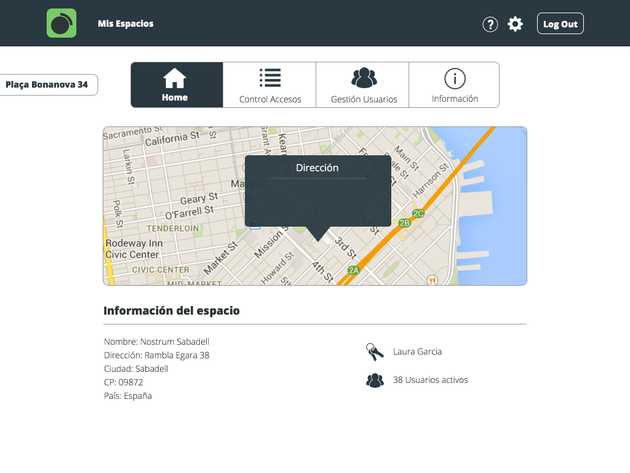
In the Home section, you’ll find a prominent map showing the location of your space, along with important data like active user count. We have significant plans for the Home section and are currently developing additional features and analytics, such as access frequency, open rates, and more.
Access Control
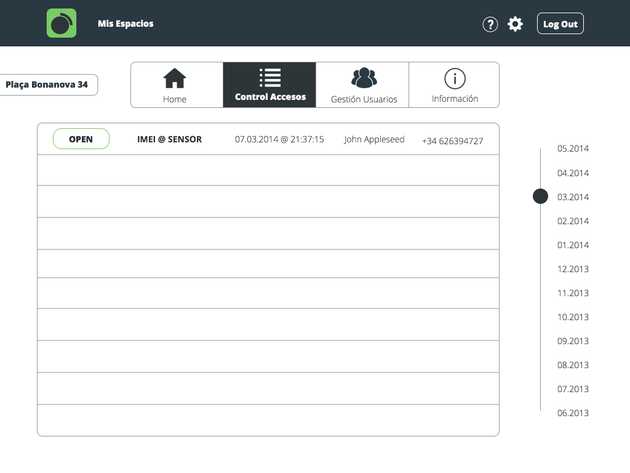
In the next tab, you have Access Control. This feature lists all the events that have occurred at each door, including a detailed log of user accesses, Door Status, and a ‘Back in Time’ capability, which allows the administrator to view the state of a door at any given moment.
Real-time, remote features such as User Management and Access Control set us apart in the industry, and have become a testament to the foresight of our past design choices.
User Management
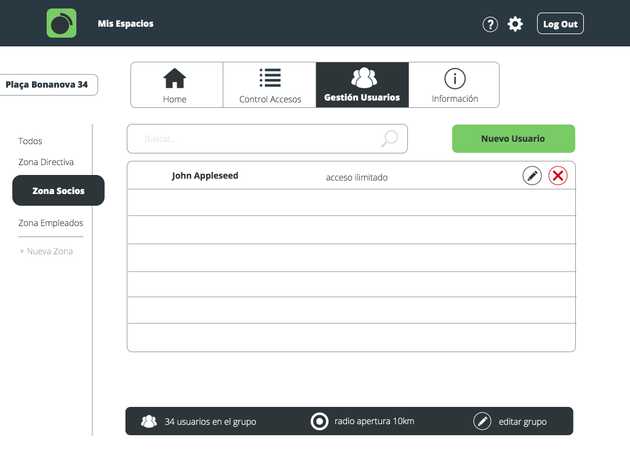
The third tab is dedicated to User Management, the core area for management activities. In this section, we want to highlight two new features: Groups and New User.
Groups
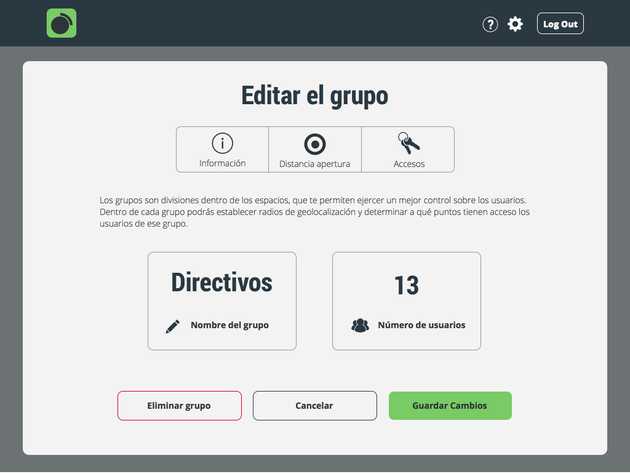
Groups have become the fundamental unit for grouping users with the same access level. You can see all Groups listed in the left column. A Group is an entity within the space that shares specific parameters, meaning every user included in a Group automatically inherits its permissions.
Every Group shares these features:
- Name.
- Accesses: The administrator can set the Group’s available accesses.
- Geofence: The administrator can also set the maximum distance from which group members are allowed to open doors.
For instance, an administrator might create a “Managers” Group with unlimited access throughout the building and no geofence restrictions. Conversely, for employees on the second floor, another Group could be created with access limited to second-floor doors and a geofence restriction of 100 meters.
New User
After creating a Group, the next step is to add users and set their time permissions. Adding users with the iomando Dashboard is more streamlined than ever. Simply navigate to the desired Group and tap ‘New User’. You can choose between basic and advanced modes.
- Basic mode is incredibly straightforward. Just enter the user’s phone number to grant them 24/7 unlimited access. Given that over 54% of total activations on our platform are 24/7, a basic mode seemed essential.
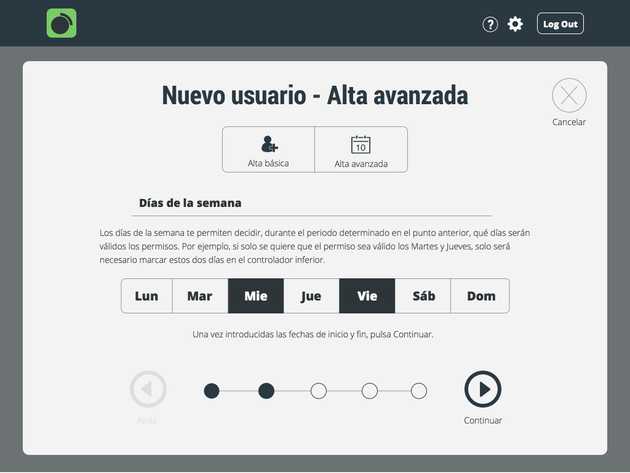
- Advanced mode, accessible with just a tap, unleashes the full capabilities of the iomando Dashboard. It enables the administrator to set restricted time frames, specific days, and even expiration dates for permissions.
So, to continue with the example above, you might use Basic mode for the Manager, granting unlimited 24/7 access. However, consider a new freelance employee on the 2nd floor who is only permitted to be present on Wednesday and Friday from 09:00 to 17:00. To set this up, simply activate the advanced mode, follow the steps, and you’re all set.
Settings
Finally, in Settings, we’re keeping things familiar for those who have used the Beta version. Here, you’ll find standard options like email, password, billing information, and other similar settings.
Final Word
The launch of the iomando Dashboard is a significant milestone for us. We always find joy in delivering new products to our customers, but this release has broader implications for our product team.
By separating the management tool and creating the iomando Dashboard, we can now independently address both aspects of the access experience — opening and managing. This separation enables us to innovate and refine each use case more effectively, free from the limitations we previously faced.
We are excited about what lies ahead for iomando. In the coming months, expect to see a lot more from us, as we dedicate our efforts to creating the best possible access experience for the mobile era.
